The Ultimate Guide to Invisible Tape-In Extensions
Achieve salon-quality results from the comfort of your home with our step-by-step guide
As Coco Chanel famously said, “Nature gives you the face you have at twenty; but it is up to you to merit the face you have at fifty.” Invisible tape-in extensions embody this philosophy of cultivated beauty, achieving a seamless, undetectable look through precise application—sectioning hair ¼ inch from the scalp, staggering wefts in a brickwork pattern, and avoiding oil-based products near the roots. With proper care, including sulfate-free washing, gentle brushing from ends upward, and repositioning every 4–6 weeks, these extensions can last securely for 4–8 weeks while the hair itself remains reusable for 6–12 months. This method transforms thin hair into voluminous, salon-quality locks in 30–60 minutes, offering a natural and comfortable solution for lasting elegance.
Invisible tape-ins provide flat, seamless volume and are suitable for most hair types.
Prep: clarifying shampoo, dry and detangled hair, avoid oils at the roots.
Install: section hair, sandwich 1–2 cm sections between two tape wefts, press for 10–15 seconds, stagger rows.
Maintain: wash gently with sulfate-free products, reposition every 4–6 weeks, avoid oil near bonds.
Risks: improper placement or removal can cause breakage — use a professional remover if unsure.
Why Choose Invisible Tape-In Extensions?
Use this short paragraph to write a supporting description of your list item. Remember to let your readers know why this list item is essential.
Discreet and Comfortable
The ultra-thin wefts and tapes lie flat, making them virtually undetectable and comfortable to wear.
Quick Application
Typical at-home installs take 30–60 minutes depending on hair thickness and number of wefts.
Versatile Styling
Blend effortlessly with all hair types and textures, allowing for endless styling possibilities.
Reusable
With proper care, high-quality Invisible tape-ins can be reinstalled multiple times.
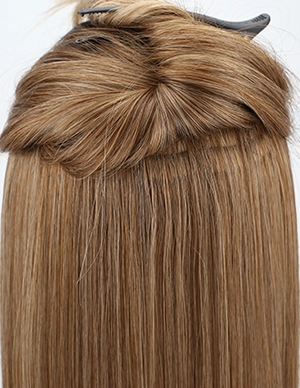
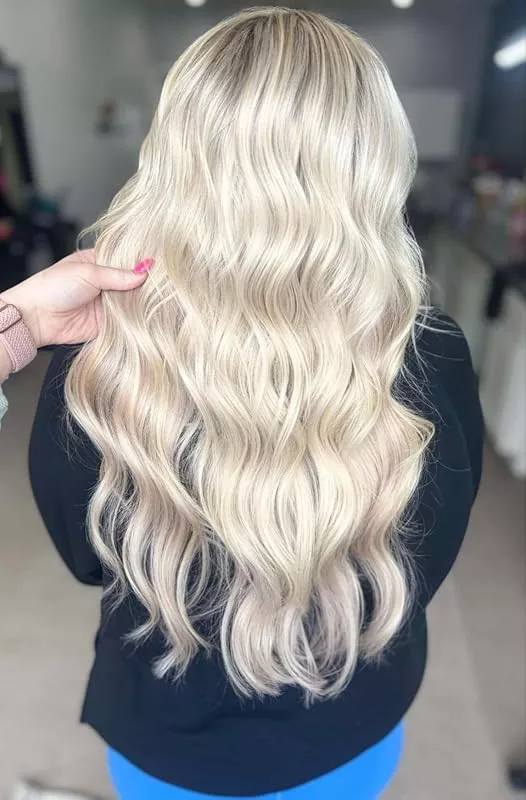
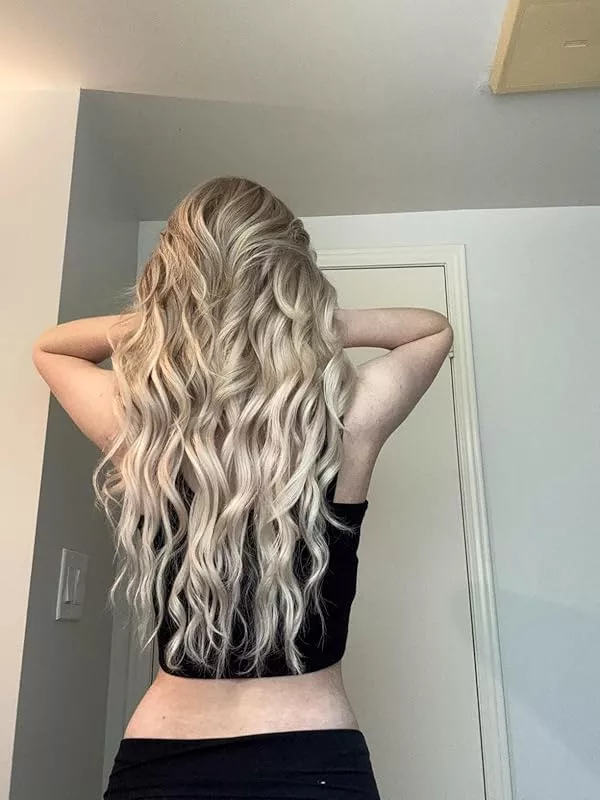
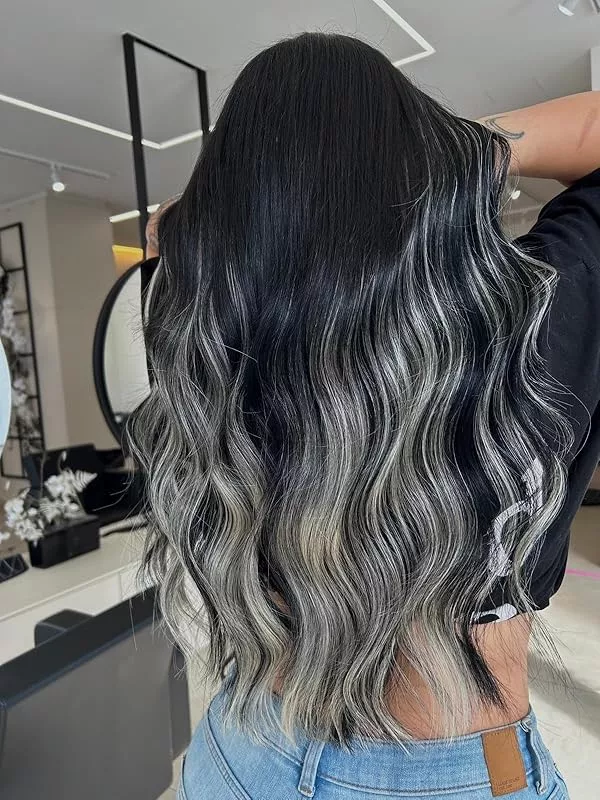
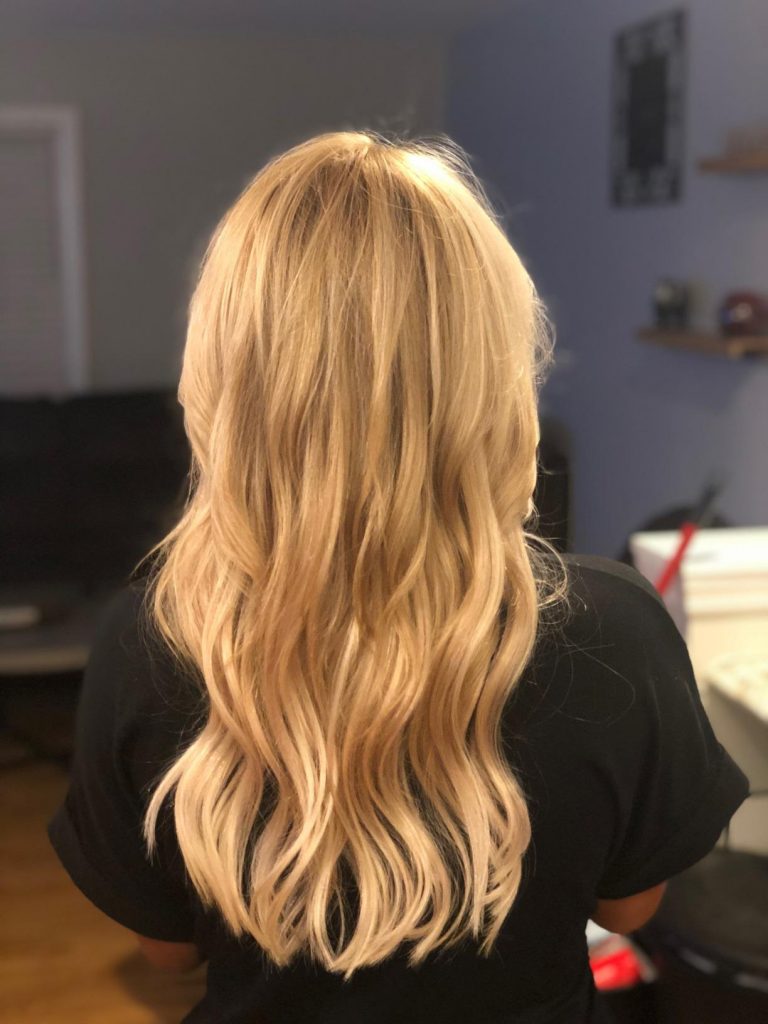
See the Transformation
Witness the visible improvement tape-in extensions can make

Natural hair with limited volume

Full, voluminous hair with extensions
Preparing Your Hair
Proper preparation is the foundation of a successful application. Create a clean, oil-free base for optimal results.
Do’s
Wash hair with a clarifying, sulfate-free shampoo
Dry hair completely before starting the application
Gently comb through hair to eliminate tangles
Use alcohol-free dry shampoo for oily hair
Don’ts
Apply oils, serums, or conditioners near the roots
Use heat styling tools before securing extensions
Apply extensions to damp or oily hair
Skip the clarifying shampoo step
Pro Tip
If your hair is naturally oily, consider using an alcohol-free dry shampoo a day before application to absorb excess oils without leaving residue.
Step-by-Step Application Guide
Follow these detailed steps to achieve a flawless, professional-looking application at home.
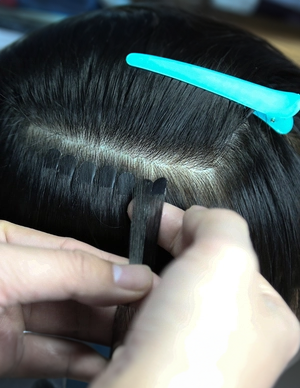
Sectioning Your Hair
Proper sectioning ensures the extensions lay flat and feel comfortable. This step is crucial when applying Invisible tape-ins to avoid bulk and ensure a natural look.
Use a tail comb to create a clean horizontal parting just above your ears
Secure the upper section with clips
Take a horizontal section of your natural hair about 1–2 cm1 thick
Pro Tip: Use alligator clips to keep sections separate and organized. This makes the process smoother and more precise.
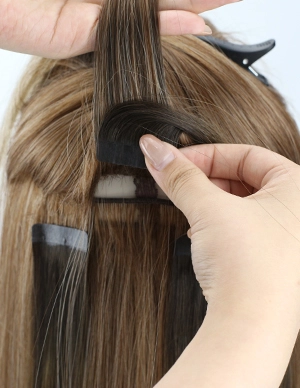
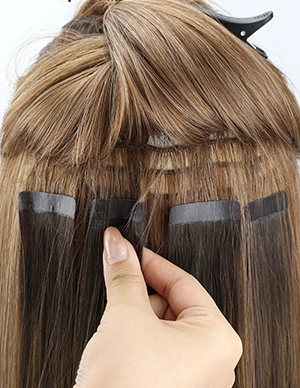
Applying the First Tape Weft
Now that your hair is prepped and sectioned, it’s time to apply the first weft.
Position the weft about ¼ inch away from the scalp
Peel off the protective backing from one side of the tape
Press the adhesive side firmly against the underside of your natural hair section
Hold for 10–15 seconds to activate the adhesive
Warning: Placing the extensions too close to the scalp can cause tension and lead to premature shedding or breakage.
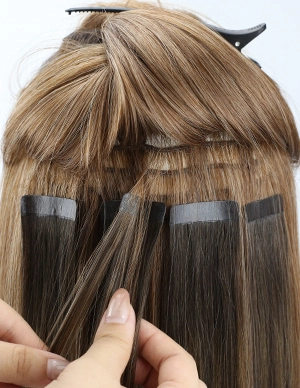
Securing the Bond
A strong bond is essential for the longevity of your Remy tape-in wefts.
Remove the backing from the second tape tab
Align the top weft directly over the bottom one, sandwiching your natural hair in between
Press the two wefts together firmly for at least 10 seconds
Run a wide-tooth comb through the sandwiched hair to ensure no tangles are trapped
Repeating the Process Strategically
To avoid a bulky or artificial appearance, follow these placement guidelines:
Leave about 1 cm of space between each row
Stagger the wefts in a brickwork pattern for even distribution
Start at the nape of your neck and work upward
Use fewer wefts near the crown for a more natural look
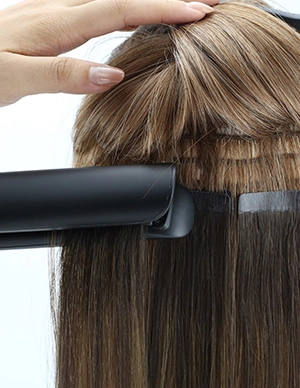
Sealing with Heat
For added security, you can use a flat iron to seal the bonds:
Set the iron to a low heat setting
Gently clamp the bonded section for 2–3 seconds
Avoid applying heat directly to the tape or the extension hair
Note: Let the bonds cool completely before styling.
Visual Guide
Refer to this step-by-step visual guide as you apply your extensions
Maintenance Tips
Keep your Flat tape extensions looking their best with these expert maintenance tips.
Washing
Use sulfate-free shampoo and conditioner to preserve the adhesive. Wash hair gently, avoiding scrubbing the roots.
Brushing
Avoid brushing the roots aggressively; start from the ends and work upward. Use a soft-bristle brush or extension-specific brush.
Sleeping
Sleep with your hair in a loose braid to minimize tangling situation. Consider using a silk pillowcase to reduce friction.
Repositioning
Schedule repositioning every 4–6 weeks to prevent matting and maintain comfort. This ensures your extensions always look their best.
Heat Styling
Use heat protectant products before styling. Keep heat tools at medium temperature and avoid direct contact with the tape bonds.
Product Avoidance
Avoid oil-based products near the roots, as they can weaken the adhesive. Opt for water-soluble styling products instead.
Common Mistakes to Avoid
Learn from these common pitfalls to ensure your Flat tape extensions look flawless and last longer.
Using Oily Near the Roots
This weakens the adhesive, causing extensions to slip or fall out prematurely. Avoid applying conditioners, oils, or serums near the bond areas.
Overlapping Tapes
Creates visible lumps and discomfort. Always ensure proper spacing between wefts and avoid overlapping when applying.
Sleeping with Wet Hair
Can cause slippage and tangling. Always ensure your hair is completely dry before going to bed, and braid it loosely.
Incorrect Placement
Placing extensions too close to the scalp causes tension and discomfort. Always leave a small gap (about ¼ inch) from the scalp.
Using Incorrect Products
Sulfate-based shampoos and conditioners can break down the adhesive. Always use sulfate-free products specifically formulated for extensions.
Neglecting Regular Maintenance
Failing to reposition extensions every 4-6 weeks can lead to matting and damage. Schedule regular maintenance appointments.
Frequently Asked Questions
Find answers to the most common questions about Tape-in extensions.
Extension Gallery
Begin your application
With the right tools, products, and techniques, you can achieve salon-quality results at home. Start your invisible tape-in extension journey today!